Showing posts with label DIY. Show all posts

Wednesday, May 9, 2012

chiced / 5

1 | 2 | 3 | 4

Here's a great idea from Annica's blog. You just need these four things (bonus if you already have some of them at home). Even if you don't have them already, they aren't that costly and the end result is definitely worth it. You could put this next to the bathtub like this. I think it would also make a great and simple side table next to the couch or a chair.

Wednesday, April 18, 2012

chiced / 4

Earlier this month, I posted this color crush. Remember, I mentioned a DIY with that color scheme? Well, here it is [finally].

For some reason, our coffee table had me stumped. Philip built it, I love it, we use it constantly, but I didn't know how to style it. Luckily, just as I started to give up, Jessica posted about that very thing on her blog. Perfect! I now had a general idea of how to go about decorating our coffee table. I would have loved to just go out and buy a tray, but my list of things to buy for our new place isn't shrinking. I figured, this was a good time for a little DIY.


It was pretty simple. I bought everything at Michael's (except for the painter's tape, which I already had). Michael's sells two sizes of trays (I went with the larger one). All the paint that I bought was from Martha Stewart's line. 

1. Paint your tray the base color
2. Once it's dry, tape off your design and paint away!

That's it. Easy right? If you want perfect lines, make sure to measure and press firmly on the edges of the tape. I like that ours isn't perfect.  ..PS: Here's another design idea for such a project.

Now that I had the tray done, I needed to actually style the coffee table. Ours is pretty simple. Below, I say "how it's styled for now" because knowing myself very well, I will most likely tire of this arrangement. I'm pretty ridiculous in that way and have to learn to let things go. Anyway, for now, we have magazines, the tray, fresh flowers, coasters, and a candle. All of these items are things we constantly use/ enjoy having around. The coasters and magazines are easy to use and put back neatly in their stack so it doesn't get too messy. Eventually, I would love to have a little stack of interior design books with something like this perched on top. All of this is usually pushed to one side of the coffee table. Until our dining table is done, this is where we eat. 


How do you have your coffee table styled? Is it something that gets used a lot in your house or just something to prop your feet on?


Thursday, March 29, 2012

chic.ed // 2


"So, what's with this whole chiced series?" you may be thinking. It's kind of like this: "Look, I chiced it!" Yes, I know I just made up a word, but let's just go with it, ok?

Remember this post? No? Well, I can't blame you. It's one of those projects that I really wanted to happen, but it never did. Until yesterday. My original idea was to handmake the flowers myself. That would mean going out and deciding on fabric, then designing the flowers and putting it all together. That's what usually stops me from getting my endless list of projects accomplished (besides the obvious, that the list never ends). I usually choose the most time consuming process. Yesterday, I just decided to get it done. It wasn't that hard:

1. I already had the mounted antlers. I got them from Tumbleweed's Odd Shop when Doug and Beca (and their furry babies) still lived in San Diego.

2. I bought the flowers at Michael's instead of waiting to make them. I didn't let myself even look at the one's at regular price- only the ones on sale (which is a lot right now).

3. As soon as I got home, I immediately got to work. This was the key to my last chic.ed project. Do it right away! How many times have you gone to the craft store to buy all of your materials, but didn't do it when you got home? When you don't get to it right away, what happens? It stays in that plastic shopping bag (receipt and all) or becomes a small pile (which we see as more clutter or mess). This bag or pile is either sitting out, haunting you every time you walk by it or by now you've stashed it up in the closet because it's been so long.

There you have it. All of that wasn't difficult, it wasn't expensive, and now I can cross this pretty project off my list. (except for the part of where to put it.)

Saturday, August 6, 2011

DIY succulent arrangement

Here's instructions on making the succulent arrangement I shared yesterday. I took it to our in-laws who just had their little girl, but it would be great as a housewarming gift or thank you gift or anything else like that.

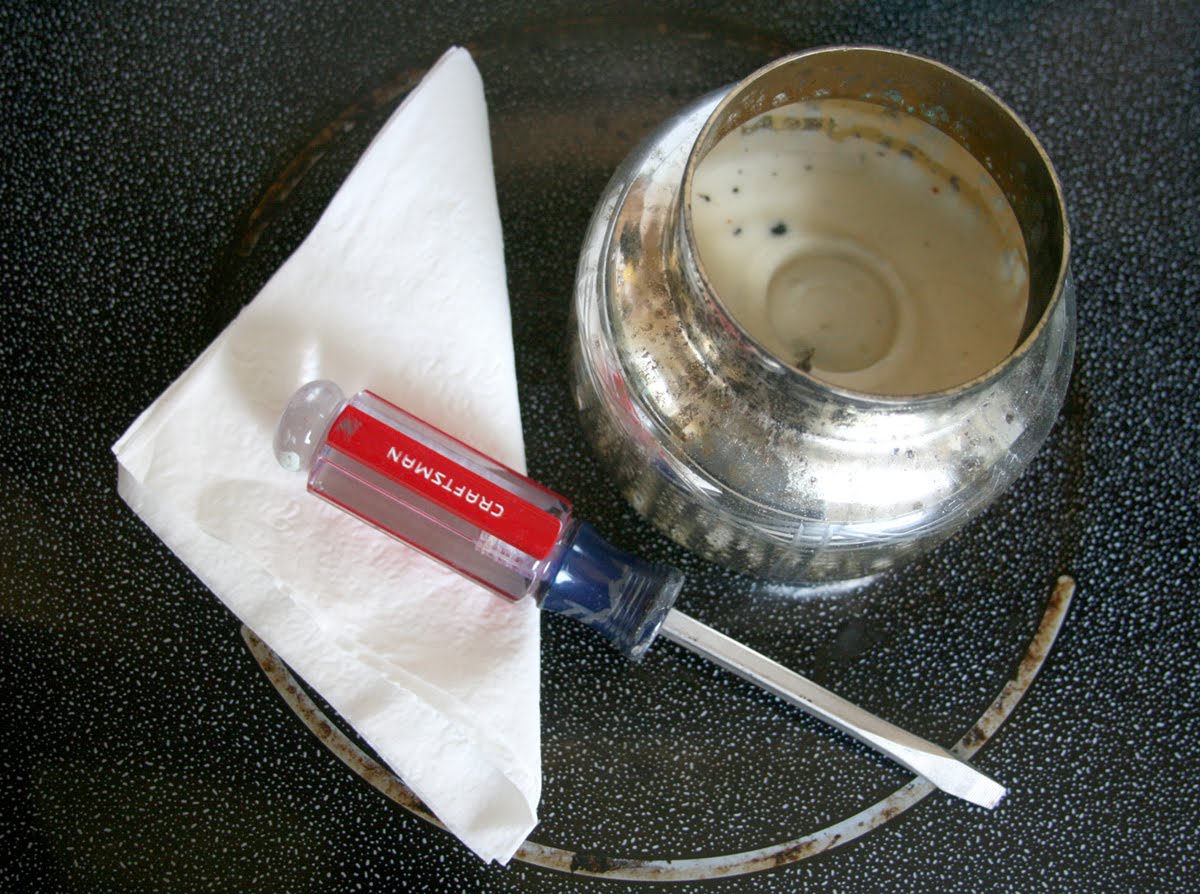
Materials for cleaning out the jar:
-old candle jar
-flat head screw driver
-napkin

STEP 1: Scrape out the old wax with the screwdriver. I thought this would be tedious and awful, but it was surprisingly easy! It all came out in large chunks. It only took a minute or so.

You can throw the wax away OR you can remelt it into another candle. This one smells SO good! Throwing it away wasn't even an option to me.

STEP 2: Wipe out the remaining residue with a napkin.

You're done! Now onto the next part of the project: Planting the succulents
Materials for planting the succulents:
-small rocks/ pebbles
-palm and cactus soil
-succulents
-your jar that's now clean

STEP 1: Fill the bottom of the jar with small rocks

STEP 2: Fill the jar with soil

STEP 3: Plant the succulents and pack the soil

STEP 4: Give the succulents some water (the soil should absorb the water and allow you to pack it a little more).

Now for the last part of the project: Decorating!

Materials for decorating:
-scissors
-edge puncher
-typewriter
-twigs/ picks
-ribbon
-hot glue gun
-twine or fabric
Step 1: Make your ribbon flags.

Step 2: Type your message with your handy typewriter. Cut it out and make your edges pretty before putting it on the jar. I used this edge puncher by Martha Stewart.

Step 3: Wrap the jar with twine or pretty fabric

You're done! Hooray! Now give it to someone special ♥

Friday, August 5, 2011

project restyle // old candle jar

I wanted to make a special something to take to the in-laws to say congratulations on the new little one. Flowers are always nice, but they die so quickly. I decided that a little succulent arrangement would be better. I remembered that I kept all of these old candle jars once the wick had burnt out. The jars were so pretty and I knew I could use them for something else one day.


This would make a great gift for any little occasion (housewarming, hostess, or to say thank you). Tomorrow I'll have a step by step DIY on making one of these yourself. Happy Friday!

PS-we're going to this event tonight. So excited to enjoy a nice night out downtown ♥

Friday, June 10, 2011

diy braided hex nut bracelet

[idea and pic from Honestly, WTF.]
Cailen and I are addicted to Pinterest [It's ok, I' not ashamed of it]. A few weekends ago, we were hanging out and decided to try this DIY that we found on Pinterest. We followed the tutorial on Honestly, WTF and this is how it went...
The store we went to didn't have the gold hex nuts in large quantities so we decided to spray paint ours.
Next time, we'll wear gloves.
We were braiding for a while and found it easier when one end was secured to something.
They turned out pretty!
Yay! Project complete :)

Cailen and I have many projects that we want to give a try. I have a whole Pinterest board dedicated to these ideas. Aye..it's endless.

I wanted to say a BIG thank you for all of the amazing compliments that we received yesterday about our songs. I was excited to share the song that I helped write [I hope to do more writing this year]. Jake is an amazing song writer. His lyrics always blow me away and I'm glad that we can share them with people.
Yesterday was so much fun. We hung out in my living room and just recorded from garage band. One live recording for our vocals and his guitar. The less takes, the better. We both hate the recording process [but what we did doesn't compare what other musicians have to do!] However, the kind feedback we got here, on facebook, and twitter was encouraging to record more. Sadly we had to cut our session short today because my voice hasn't fully recovered from being sick [almost a whole month with no voice].
Just wanted to say thanks for listening ♥


Monday, May 23, 2011

pinterest picks: diy

3. Making your own ruffle via 2 Gypsy Girls.

All of these can be found on my pinterest boards.

Philip and I have been sick all weekend. So far, it's cold and gloomy outside. With those two things considered, I don't feel bad about staying in my PJs today. I'll be crafting, watching some more Arrested Development, taking lots of vitamins, sipping throat coat, and eating soup. I hope your Monday is nice and productive :)

Monday, April 4, 2011

5 minute project.

I found this tutorial on making paper feathers. Don't they look great?! They were so easy! Each one only took about 5 minutes or so.
We have so many page cutouts from Philip's lamps. I'm constantly trying to think of new uses for them. This was a great way to start a Monday ♥

Monday, October 18, 2010

Sweet little find.


I am a big fan of any work that comes out of Studio Violet. This book is no exception. How cute are these pictures?! I want to buy this for a little person in my life.


Also, Chelsea posted the cutest DIY owl lady costume for one of Elsie's tricks and treats post today! So adorable! Maybe I want to change my Halloween idea??? We were going to be Mr. And Mrs. Fox from Wes Anderson's amazing film.

Wednesday, October 13, 2010

being inspired is being productive.

This morning, you might say that I'm starting my day a little late. I have a lot to do before the shower this weekend and I need to make the most of my time today. But i was! I promise! This is what ive done so far...
I drove to the coffee shop and parked far away so that I could enjoy the morning air. Walking outside in these cute little neighborhoods does wonders for me! The past hour or so, i sipped my coffee, had some devotion time, checked emails, and soaked in some inspiration out there in blog land. This is the best way for me to start my day! I had some time to myself and I am so easily inspired by those walks, the feeling of the morning air, and finding so many inspiring posts. Now my mind has a million more ideas, my crafty heart is so excited to get everything done, and my OCD side of my brain can't wait to finish it all so i can give lots of attention to our messy house!
Here's a little inspiration to share with you before I start my to do list...

I feel like everything that I'm in love with lately is Swedish. Fashionistas, decor, furniture- everything. I definitely can't read this blog, but that's ok because she has cute pictures of her baby belly and vintage dresses.

I found these photos over at 100 layer cake yesterday. Beautiful.

I'm always inspired by Miss James's "What We Wore" posts. Her cute little family is so stylish!

I found this gorgeous and simple DIY on Danni's blog. She just got married and while they are honeymooning, she has a new guest blogger everyday.


I was so giddy when I found yet another mad hatter tea party bridal shower to spark some more ideas! Here.


Also over at green wedding shoes, I found these GORGEOUS pictures! I am absolutely in LOVE with the silhouette of this dress and I think the mix of the colors in is bouquet is fantastic!

I hope you're inspired. I know I am. I think now is a good time to start my day :)